Sweet Cherries

Step by Step
See if you can create this realistic and mouthwatering cherry design by Anastasiia Morozova. Perfect your shading and add water drop placement – and your design will look good enough to eat!
Step 1
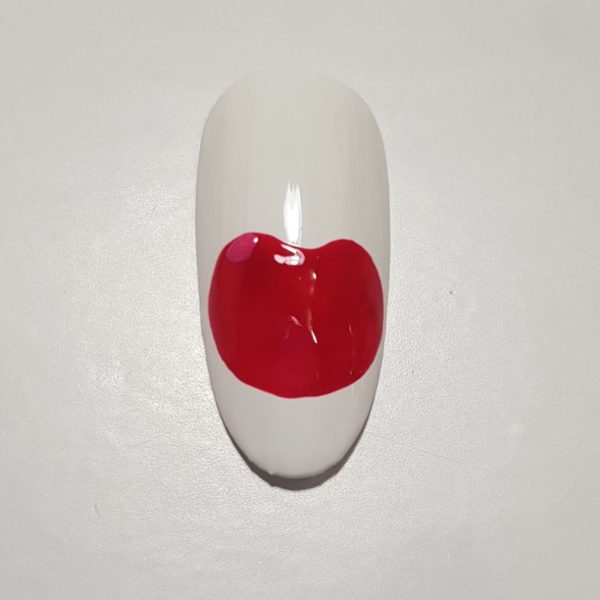
Paint the nail in your chosen background colour. Cure. Paint a cherry shape with a red gel polish and cure.
Step 2
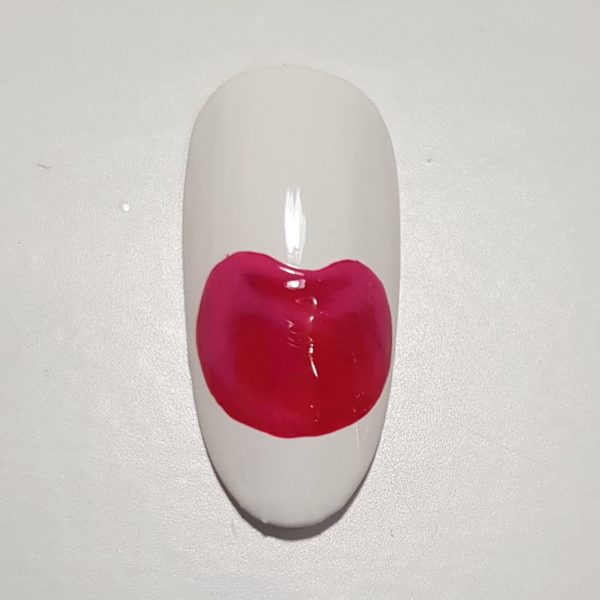
Mix your red gel polish with white and lighten the areas of your cherry on the area where light falls. Cure.
Step 3
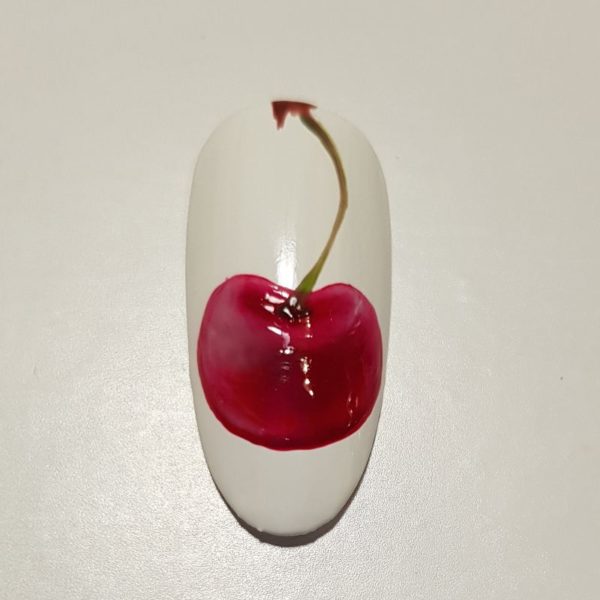
With a darker red gel polish, add shadow to your design to create contrast. Cure. Add a curved stem in green and brown tones. Cure.
Step 4
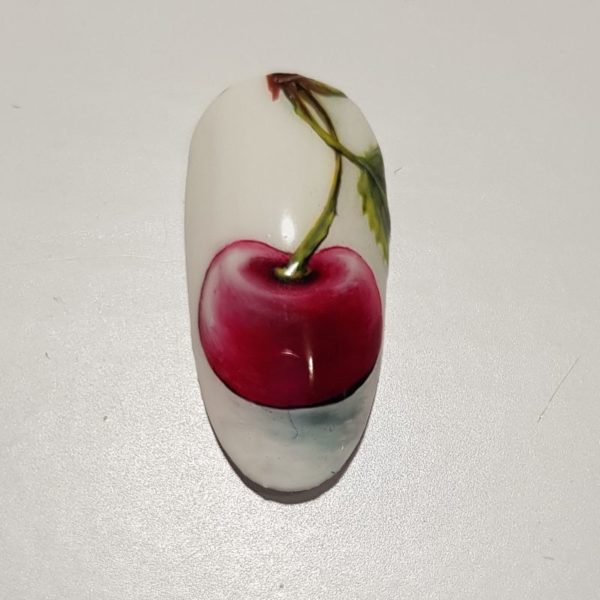
Add leaves. Outline and add detail to the cherry with a black gel paint. Add shadows under the cherry, too. Cure. Apply your top coat and cure.
Step 5
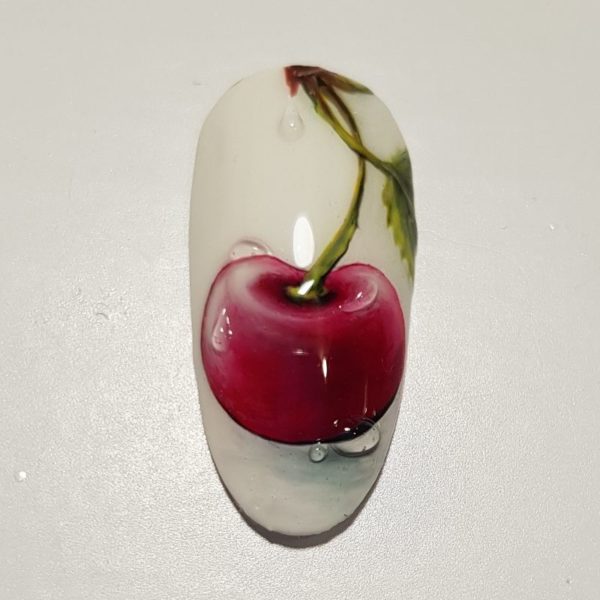
Using a thick builder gel or a very thick top coat, create water drops on the fruit for a multidimensional look. Cure.

Read the latest issue