How to create a nail design inspired by the Adidas x UEFA Euro 2024 football

Seasonal & Occasions, Step by Step
Award-winning nail artist & educator, Kristie Jauvais, is based in the La Tour-d’Aigues commune in South-eastern France. With a focus on elegance and wearability for this step-by-step, Kristie was inspired by Adidas and UEFA’s Euro 2024 football design: Fussballliebe, which means ‘love of football’ and represents the joy of football and energy of the championship.
Step 1
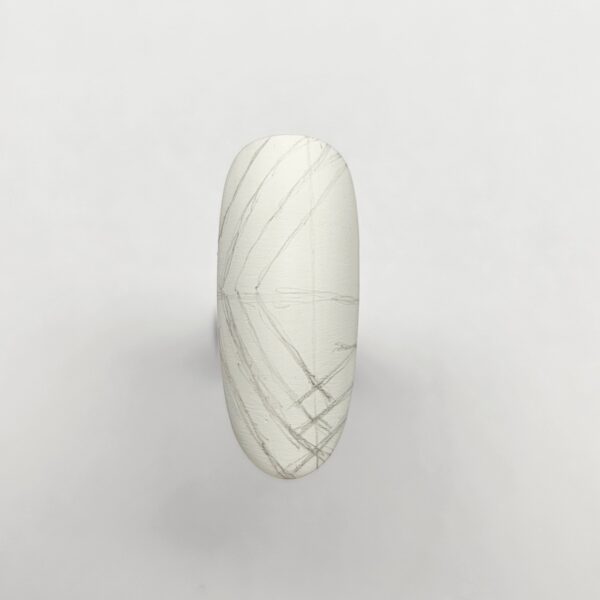
Prep the nail, apply a white gel polish base, cure then buff. Draw the lines of the design pattern onto the nail using a pencil. Be careful not to press too hard – the lines should be light to simply guide you during the next steps.
Step 2
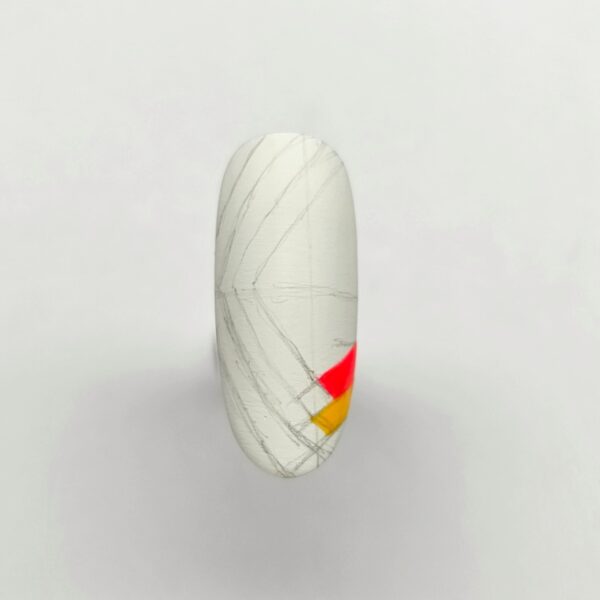
Fill in each part of the pattern using gel colours matching the Fussballliebe design and fine liner brushes for efficiency. I used neon red and saffron yellow gel polishes here, but you could also use gel paint. Cure between each colour application.
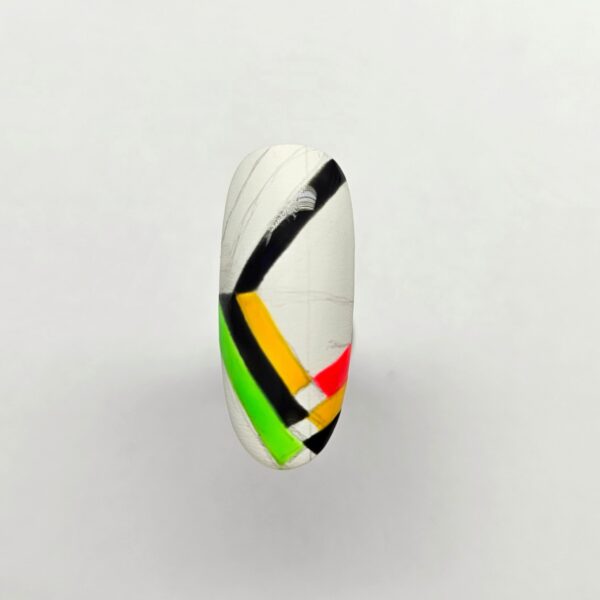
Step 3
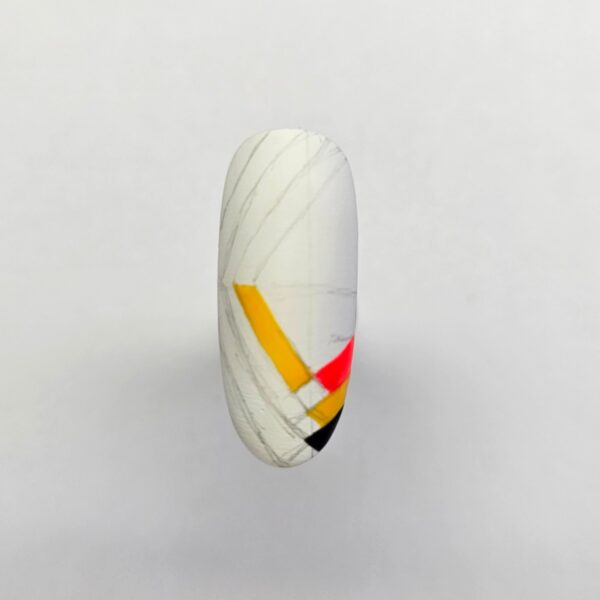
Continue to fill in the pattern. I started with the lighter colours, because it is easier to cover them with darker colours if a mistake is made. I started to add black gel polish here.
Step 4
I added neon green gel polish, remembering to cure between each colour application.
Step 5
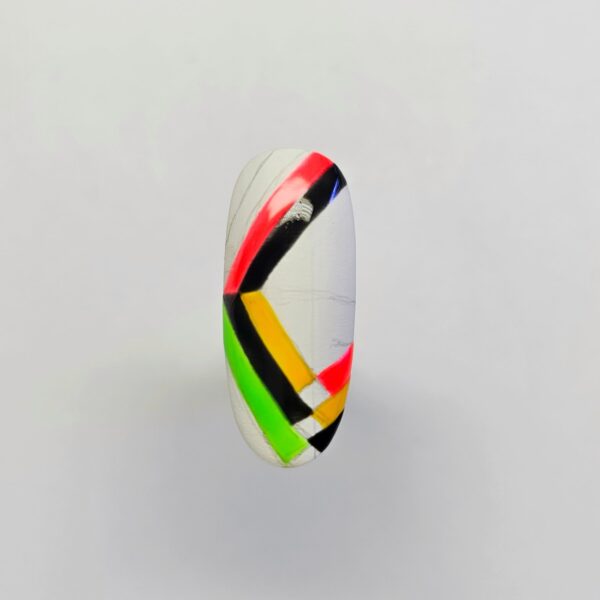
As you continue to fill in the pattern, add a second layer of gel polish over each coloured area and cure, so that the hues are bright and uniform.
Step 6
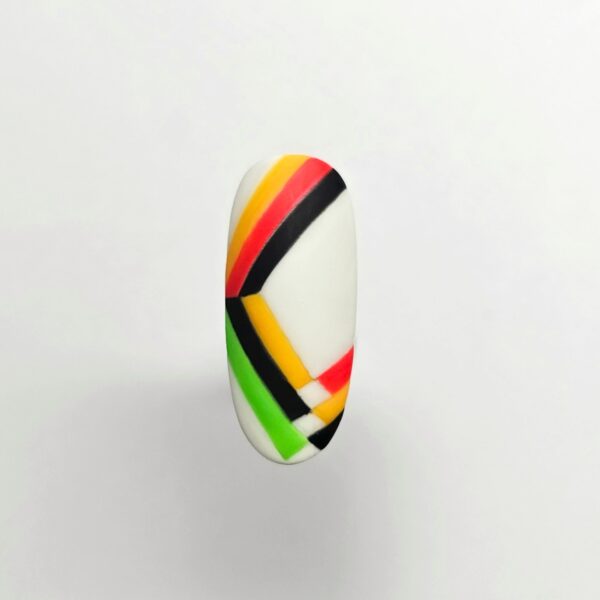
Once all the coloured areas are finished, paint the gaps around them with two layers of white gel polish, curing between each coat.
Step 7
Apply matte top coat and cure.
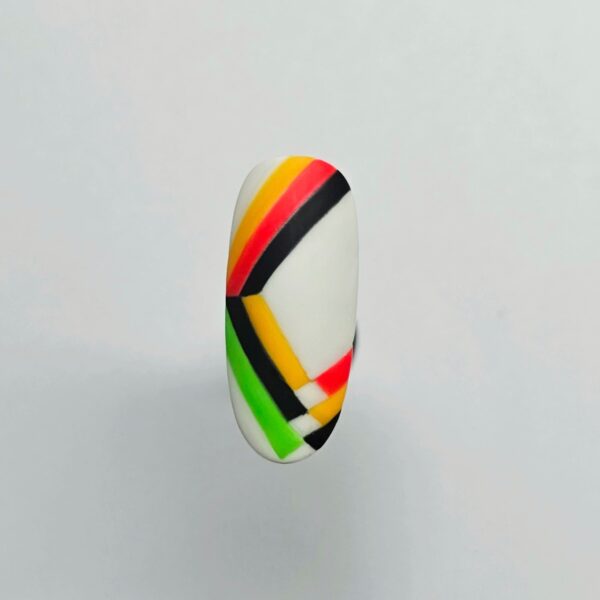
Step 8
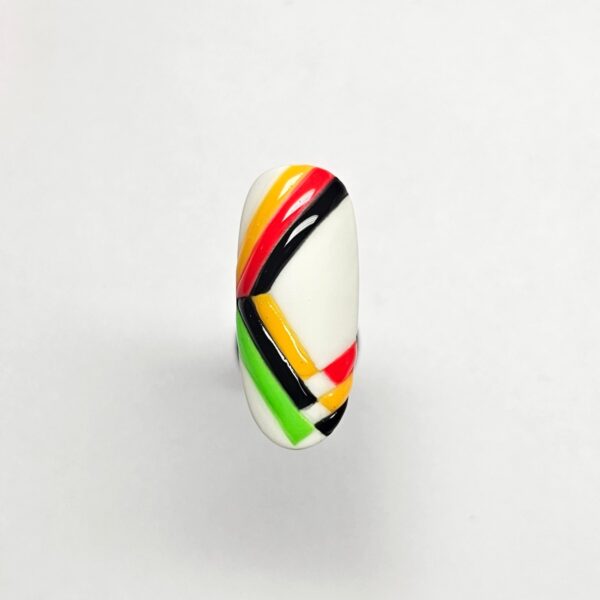
To create contrast, add glossy top coat to each of the coloured stripes, curing them one by one to ensure the design stays in place.

Read the latest issue