Extreme nail shapes: Kayley Cairns stiletto
Step by Step
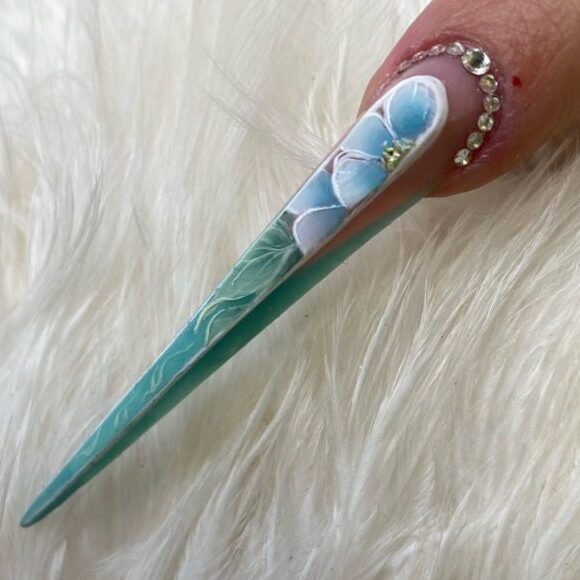
Follow along as Kayley Cairns shares her steps to creating a stiletto shaped nail using HD Pro Nails products…
Step 1
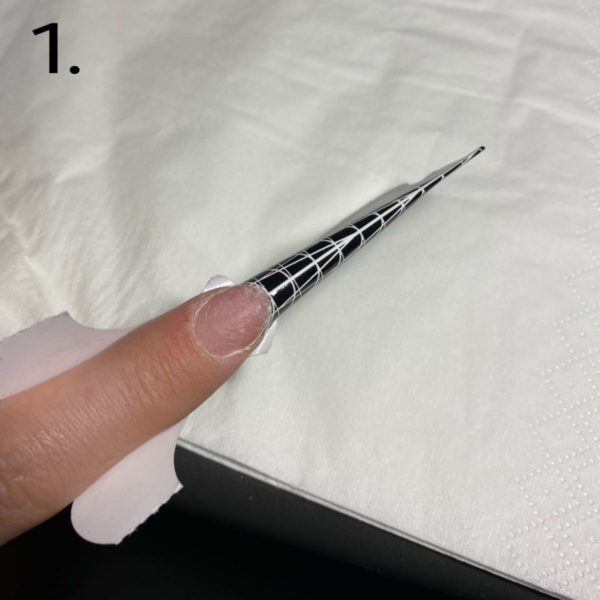
Prep the nail for L&P acrylic enhancements. Tailor and fit the form for a stiletto nail shape.
Step 2
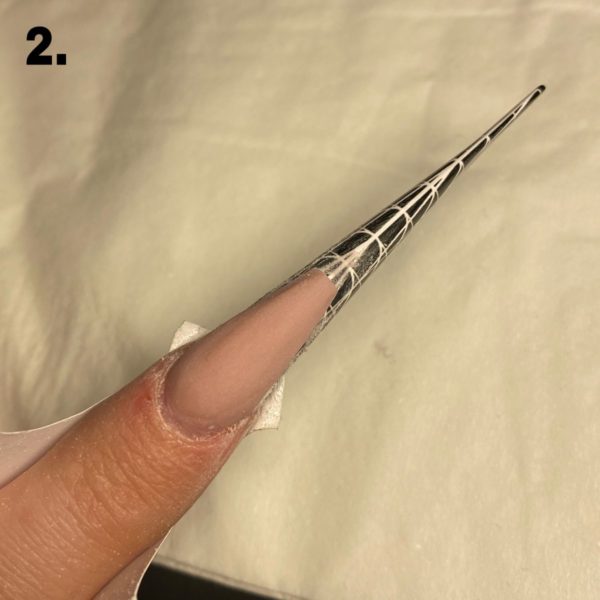
Using the reverse application, apply HD Pro Nails Dusty Rose to create an extended nail bed with straight sides and a flat end. It should be like a coffin-style shape.
Step 3
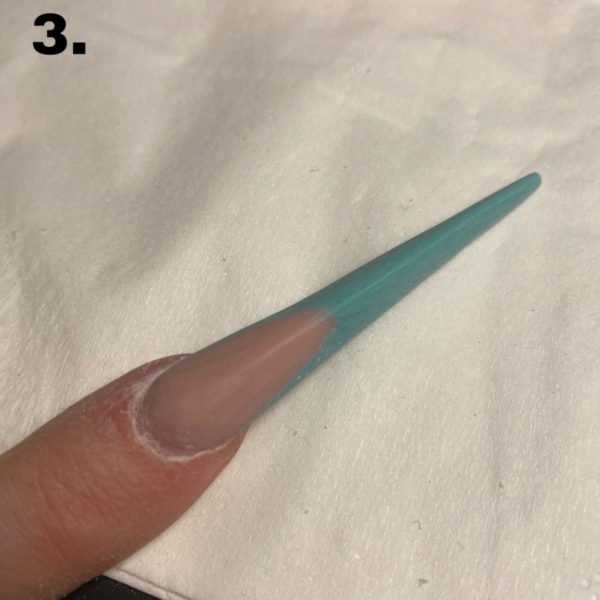
Apply HD Pro nails in Peppermint Cream to the free edge. Press the product towards the centre of the nail as for a stiletto nail.
Step 4
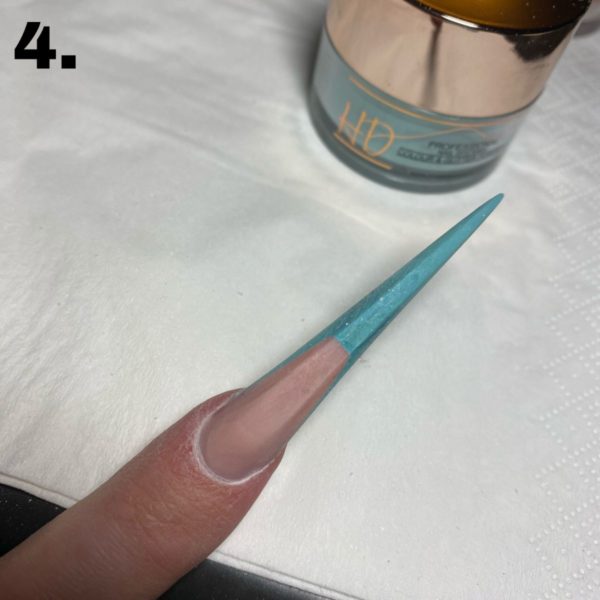
Using a newly prepped file, hold it parallel to the nail to refine. Alternatively, use an e-file with a KUPA 3 in 1 coarse bit. Flatten the top from the apex down to the tip of the nail. Take extra care at the tip not to file through where the product gets thinner.
Step 4
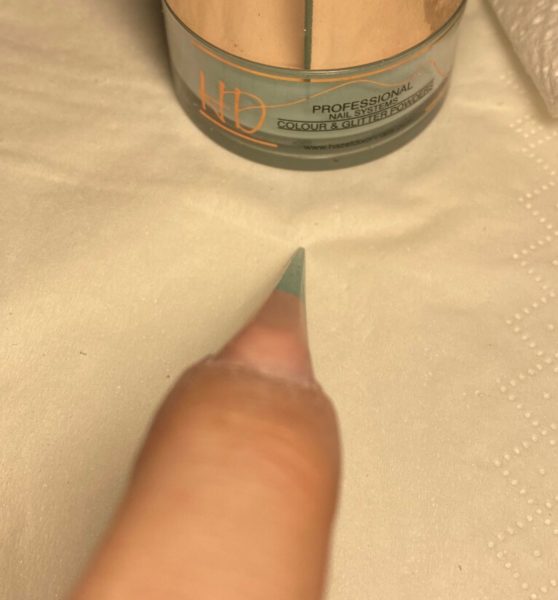
File your lower arch straight and the side walls should taper to a point as for a stiletto. The sides of the nail should be filed flat to sharpen and emphasis the flat top.
Step 5
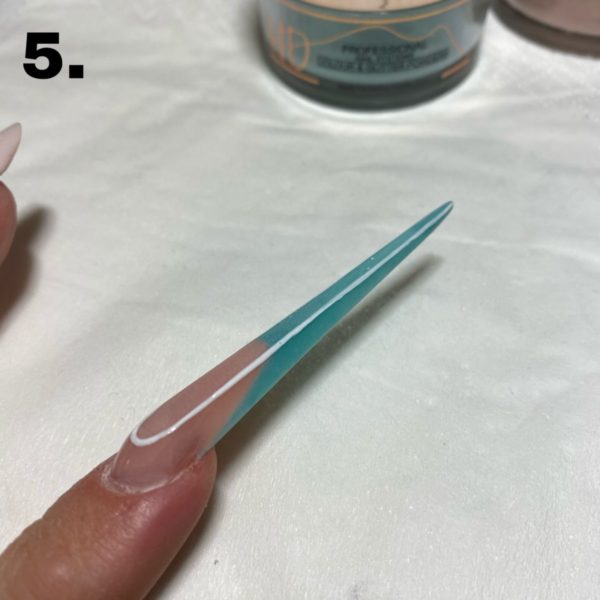
Outline the flat edge of the top of the nail using HD Pro Art Gel paint in Polar. Cure.
Step 6
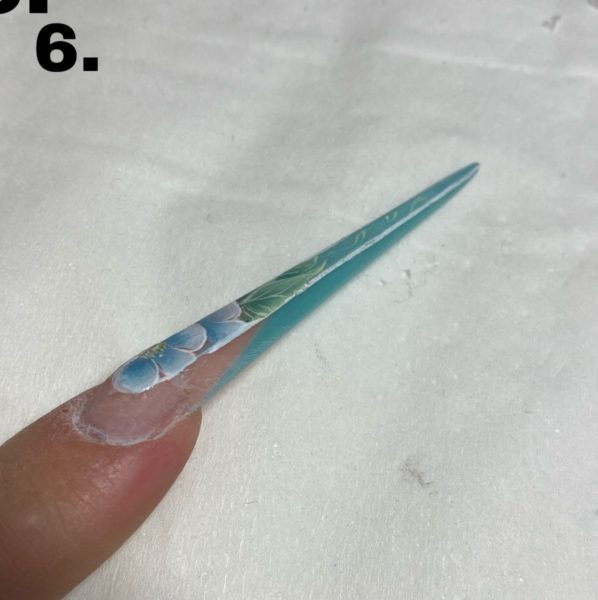
Add art to the flat top of the nail using HD Pro Art Gel paints and HD mini one stroke brush. Finish the nail with HD Pro Shine It! No Wipe Top Coat along the sides and cuticle end. Cure.
Coat the flat top with HD Pro Matte and cure. Embellish with Swarovski crystals.

Read the latest issue


