Extreme nail shapes: Dorota Palicka Stiletto

Step by Step
Award-winning international educator, Dorota Palicka, shares this step-by-step for creating an extreme stiletto nail shape…
Step 1
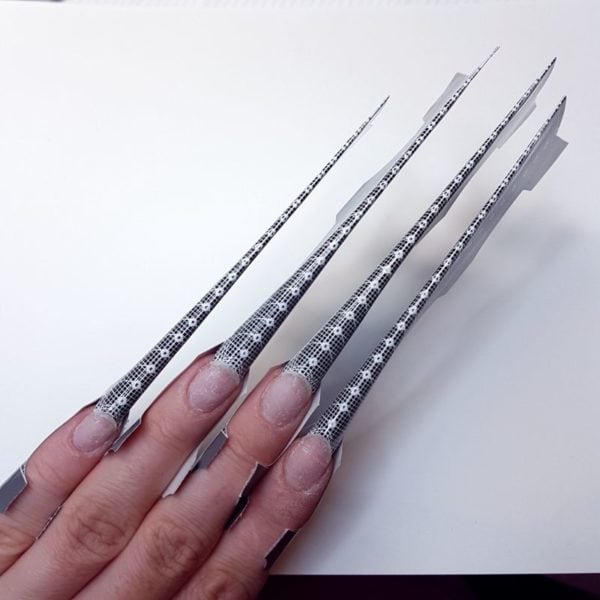
Prep the natural nails using 180 grit file to etch the nail plate. Next, dehydrate.
Prepinch and apply extreme nail forms, if needed cut the forms at hyponychium for better fit. Also cut at the lateral nail folds place so you can get better pinching. Prime the nails.
Step 2
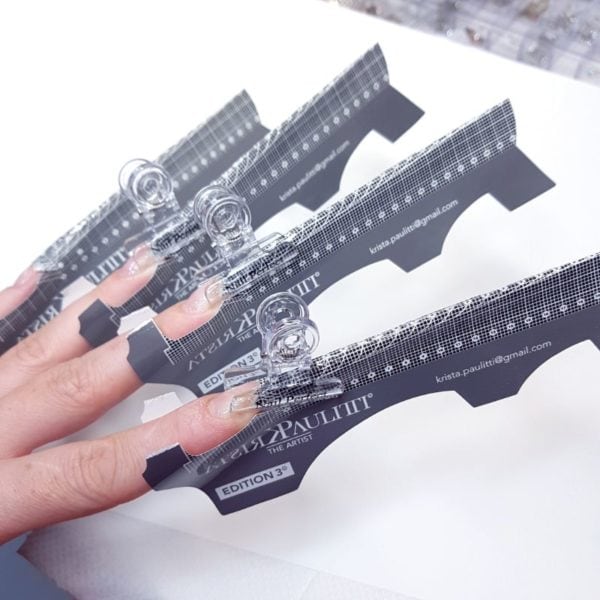
Apply thin layer of clear gel, like nail polish on natural nail plate. Make sure you rub it it well as it will give you increased adhesion. Next apply the thin layer of the clear gel on entire free edge. Make sure it is nice and even (for more consistent pinching as the thicker place will pinch less compared to the thinner application which may result in uneven c-curve). Add a tiny bit more gel where the natural nail plate join the form.
Ensure you pinch the nail in accordance to your chosen system and in line with training guidance. For this step-by-step, I cured half of recommend time and applied pinching clamps at the widest part of the enhancement. When working with gel, the pinching clamp should be clear in order to get proper cure.
Fully cure the product.
Step 3
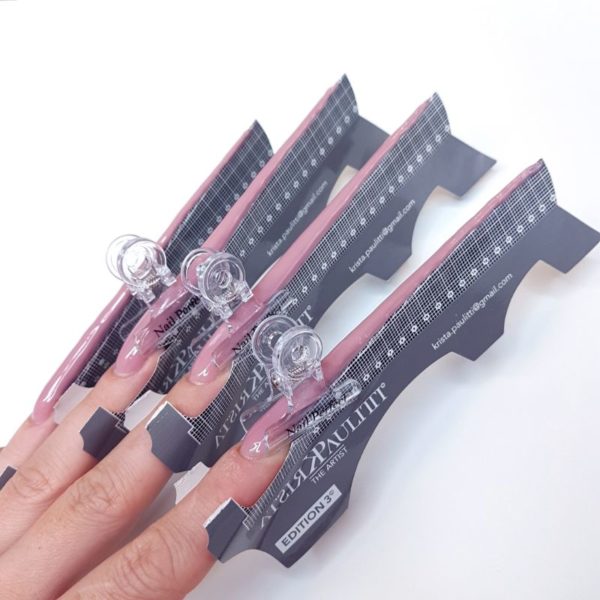
Using cover gel, apply thin layer on entire nail like a nail polish then pick up large amount of the product to build the apex. Use full belly of the brush for the application working from one side to the other side at the same time holding nail down so the gravity help you with application. Concentrate on the centre of the nail, don't go to close to the sides.
Cure half recommend time and pinch then full cure.
If necessary apply another layer of cover gel on entire nail enhancement and cure.
Step 4
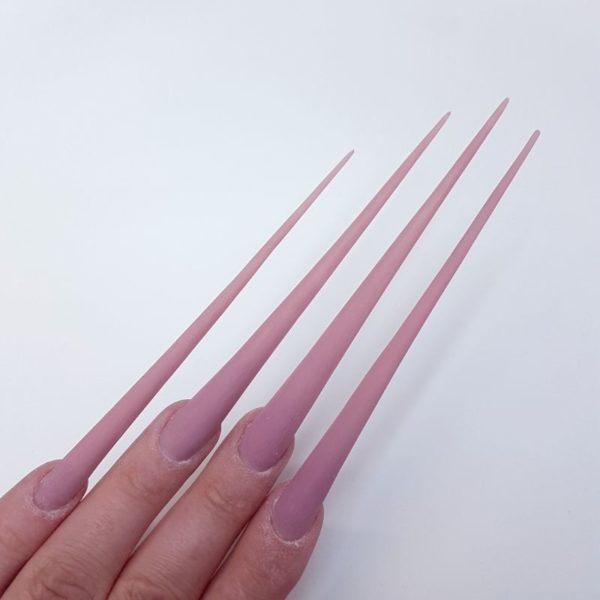
Remove inhibition layer and shape the nail using a file. Buff for nail art.
Step 5
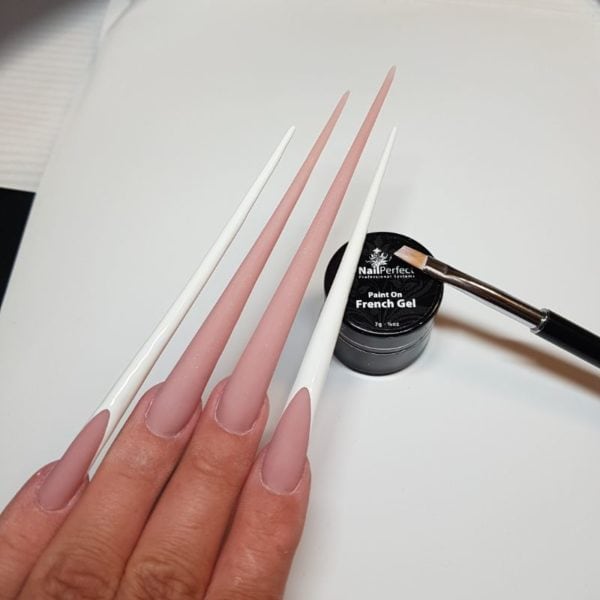
Using angular brush and paint on French smile line with nail art gel to create sharp smile lines. Leave the middle and ring finger. Make sure the corners of the smile line are at the same height and the smile line is balanced. For best results keep pushing the gel to the smile line in the same way as painting near proximal nail fold area.
Step 6
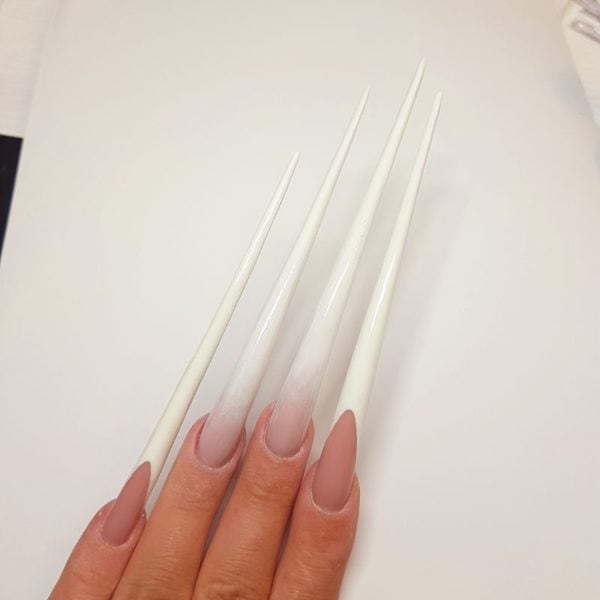
Using a sponge technique to add a white ombre Babyboomer fade on the ring and middle finger.
Step 7
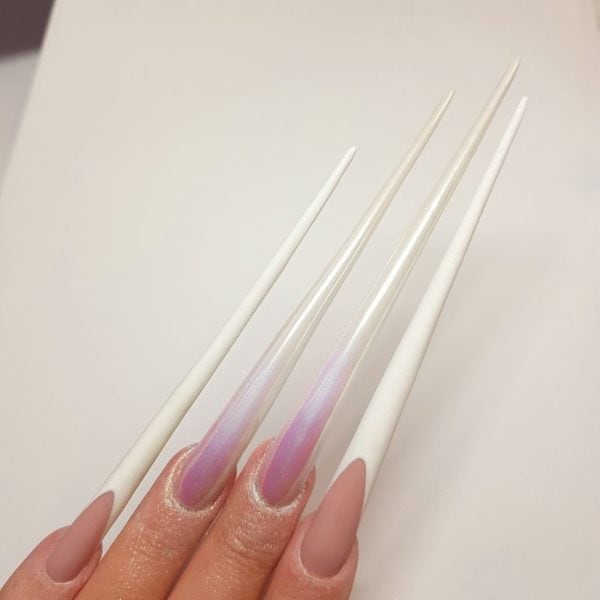
Use no wipe top coat and cure then apply aurora pigment on the two Babyboomer nails. For best results make sure you rub it in very well then remove excess of the pigment with soft brush as any remaining pigment will give you uneven look. For long lasting results touch the free edge with file and then apply top coat. Cure.
Step 8

Buff the French nails and apply Swarovski crystals with a brush on glue. Apply top coat, avoiding the crystals. For difficult places, use a fine liner brush to apply top coat around them. Cure.
Step 9
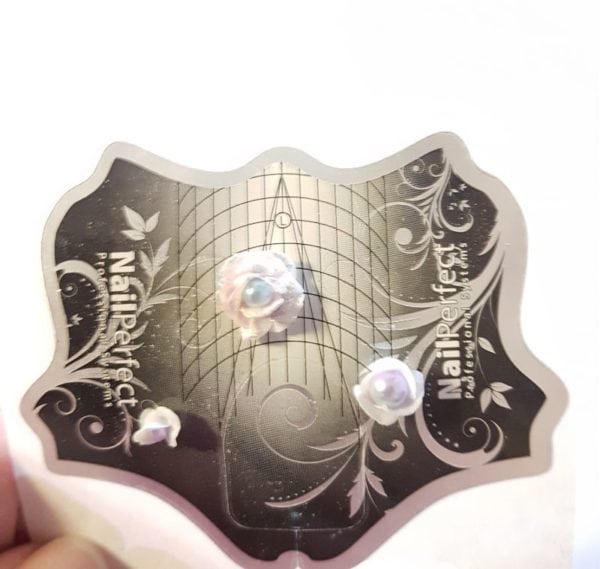
Using white acrylic powder create 3d roses with a pearl middle. When the roses are set, dip your brush in monomer followed by an aurora pigment and apply it on the edges of the petals.
Step 10
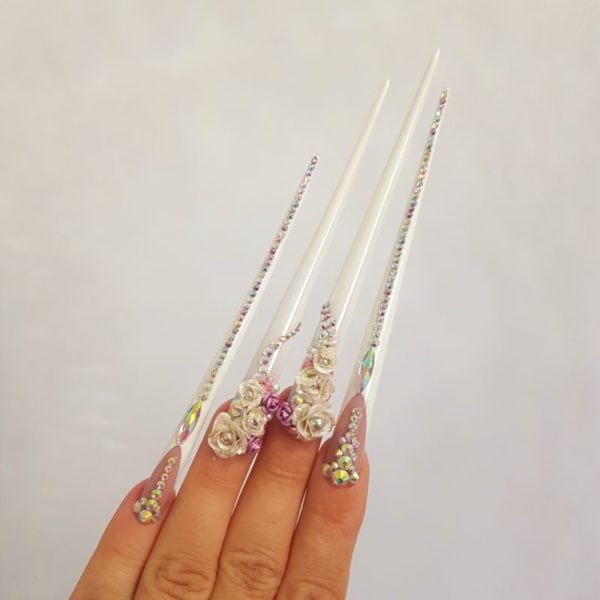
Using glue apply 3d roses together with Swarovski crystals, top coat to finish your design.

Read the latest issue


