Easter nail tutorial: rabbit nail art in 4 simple steps

Seasonal & Occasions, Step by Step
Nail artist & content creator, Carla Brannan of @gelled_pretty, shares a step-by-step guide to perfecting an adorable rabbit design.
She uses Gems Nail Systems products, available via www.gemsnailsystems.com
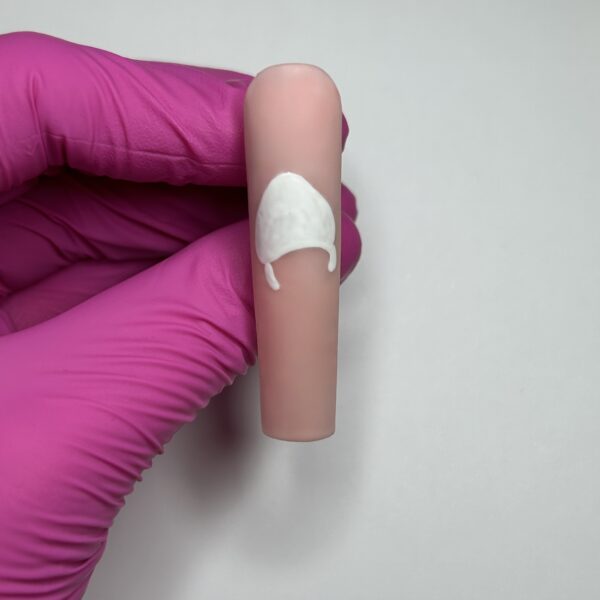
Step 1
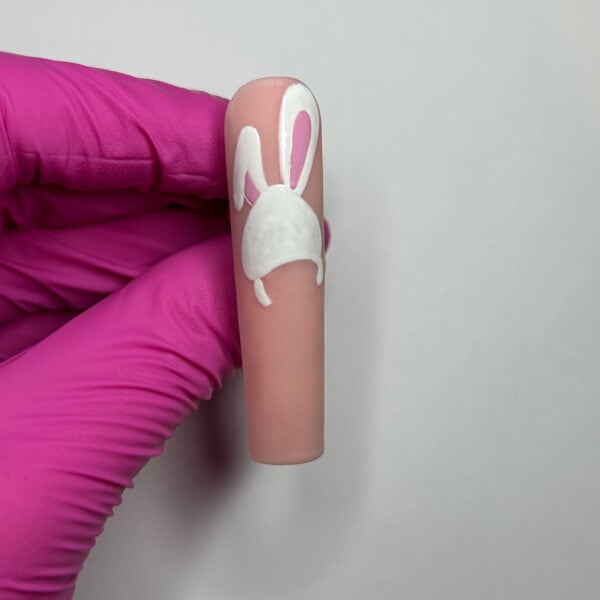
Apply two coats of Gems Full Control Gel in Jodie to the nail, curing between each coat. Apply a matte top coat and cure, then paint a curved triangle for the rabbit’s head and arms using Gems Gel Polish in Angel. Cure.
Step 2
Using the Angel shade, paint one long, straight ear and one flopped over. Cure, then paint the inside of the rabbit’s straight ear with Gems Gel Polish in Ellie-Jade. Cure.
Step 3
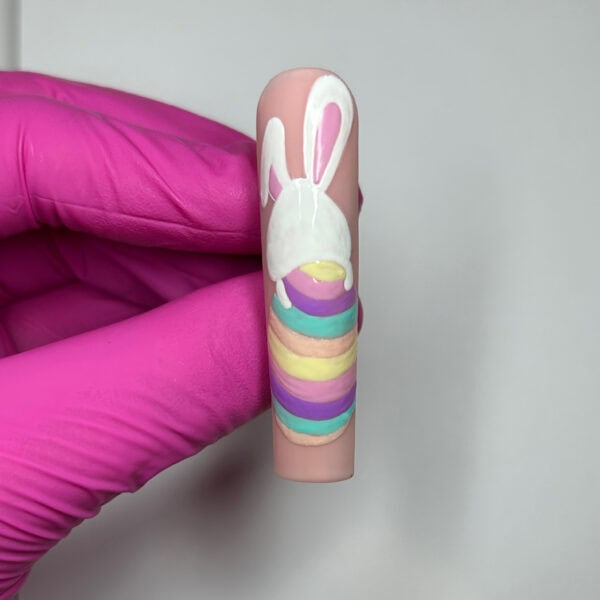
Paint a curve from underneath the rabbit’s face using Gems Gel Polish in Flora. Cure, then continue the process down the nail using shades: Ellie-Jade, Erin, Lily and Lulu. Cure after applying each colour.
Step 4

Using a black art gel, paint two eyes, a nose and a mouth, curing after each application. Outline the design in the same hue and cure. Apply Martha Matte Top Coat and cure to finish.

Read the latest issue