All Fired Up

Step by Step
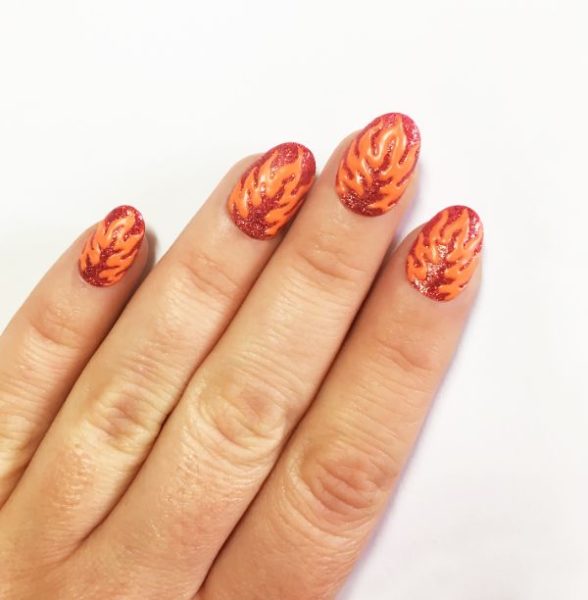
Featuring bright, autumnal hues, this nail design is sure to be popular with trailblazers all year round. Sophie Harris-Greenslade, aka The Illustrated Nail, reveals how to create the look.
Step 1
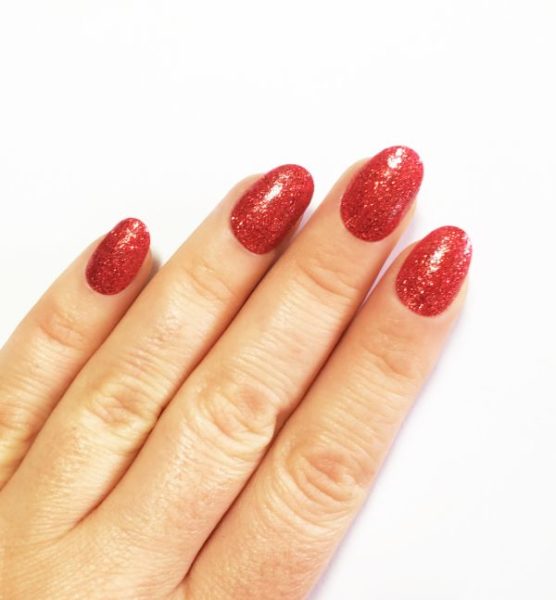
Paint all nails in two coats of Ruby Slippers by Barry M.
Step 2
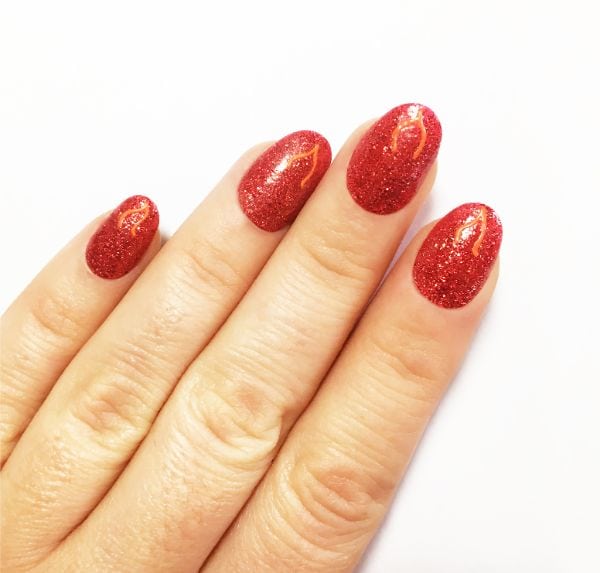
Using a fine detailer brush and Flip Flop by Barry M, paint on a linear tip of a flame at each nail tip.
Step 3
Repeat step two around the edge of each nail to create more flame effects.
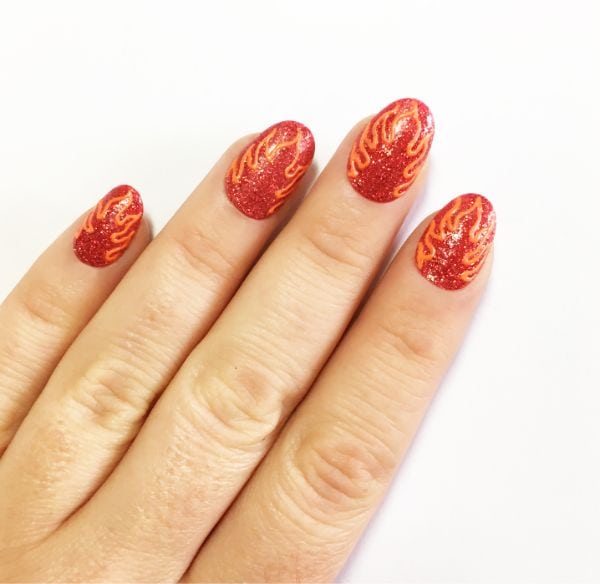
Step 4
Thicken the inside of the flame outlines with Flip Flop by Barry M and a fine detailer brush, leaving a flame shaped space of red glitter in the middle and at the tip of each nail.
Step 5
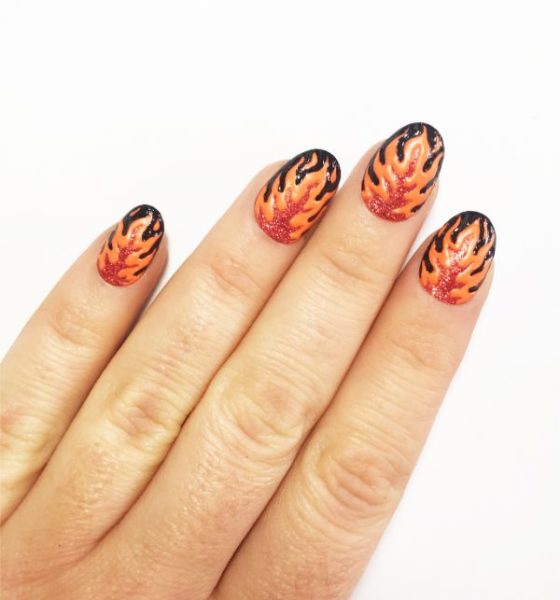
Add small fire spark detailing at the tip above the main flame using ‘Flip Flop’ by Barry M and a fine detailer brush. Paint each nail tip above each flame with Black Forest by Barry M.
Step 6
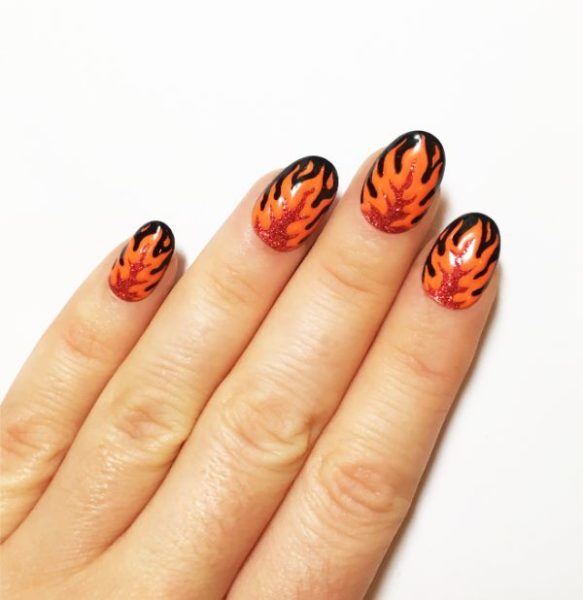
When dry, finish with a quick dry top coat like Plumpy by Barry M.

Read the latest issue