How to remove enhancements without damaging nails
By Katie Barnes | 24 January 2017 | Expert Advice, Feature, Technique

Salon owner, educator, former Scratch columnist and award-winning nail stylist, Katie Barnes, reveals how to remove enhancements correctly – and what happens if you don’t.
One of the biggest nail myths is that ‘nails need to breathe’. Nails are made up of several layers of dead, compacted cells and do not have the capability to breathe or absorb oxygen into the nail plate. All the nutrients that the nail needs are absorbed through the bloodstream and not from any outside elements.
Another common myth is that enhancements should be soaked off occasionally to ‘give them a break’. Nothing is gained by removing nail enhancements for a few weeks or months before reapplying them. Since the nails do not need to ‘breathe’, no benefit is gained by waiting to reapply nail enhancements, which includes nail polish. Nor does it make sense to assume the nails only need to breathe every once in a while.
Providing the nail technician is performing correct and professional procedures, along with using good quality products, there is no need to remove enhancements.
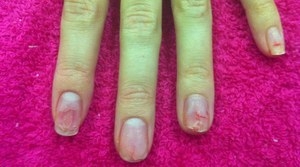
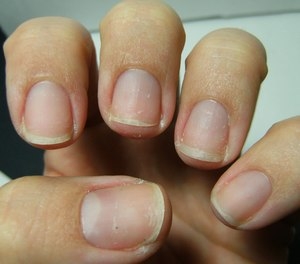
We’ve had many clients claiming that enhancements ruined their nails – yet when questioned, it turns out they had picked them off! Any damage to the natural nail is usually the result of improper application or removal, overly aggressive filing or client abuse such as picking or biting. When both L&P and gel enhancements are applied, maintained and removed correctly, no damage should occur.
Improper removal of nail enhancements is a major cause for natural nail damage as these are not gentle or correct techniques. When the nail is picked, prised or pulled off, it will rip up layers of the natural nail plate. You must ensure that your client returns for correct removal from you and if they really cannot get to you, you must provide them with correct and professional instructions for safe removal to prevent them from damaging their nails.
Removal of L&P enhancements
Correct removal for L&P enhancements requires soaking the enhancement with acetone. There are two ways of soaking the enhancements with acetone: the ‘bowl’ method or ‘foil wrap’ method. The acetone swells the polymer network until it breaks into chunks, and the polymers will swell faster if the acetone is slightly warm.
You must ensure that the acetone is never hot as this can cause an adverse reaction or burn the client. The process has a similar effect to when a roll of kitchen towel is put into water – if you poke it with a stick then it will break up even quicker.
To speed up the removal process, every 10 minutes you can gently use a cuticle tool to remove already dissolved product and gently buff. Do not be tempted to press too hard when doing this or forcing the undissolved product off, otherwise you will cause natural nail damage.
Removal of hard gel enhancements
Correct removal for hard gel nails is generally to gently buff off – hard gel will not soak off in acetone, however soak off gel polish or gels can be removed with acetone. The reason for this is that the urethane acrylate oligomers chosen to create hard gels had a tight molecular structure, resulting in a lower molecular weight. This makes them highly resistant to solvents such as acetone.
Soak off gels such as gel polishes have been specially formulated to have a higher molecular weight, therefore allowing them to soak off with acetone. Gel polish and soak off gels can be removed with the foil wrap or bowl soak off methods however I prefer the foil wrap method as I find it helps to speed up the removal process without the risk of spillages and product waste.
Top tips for removing enhancements
1. Remove surface shine on the nail enhancement with a 150-grit nail file. Many gel top coats are acetone resistant and will not allow the solvent to penetrate.
2. Leave the nails in the acetone for 30-45 minutes. The nails must not be removed from the acetone, so check the client keeps them submerged in the bowl or correctly wrapped in foil because if they are removed, the product sets again and will extend the removal time.
3. Always remember chemical health and safety when it comes to dealing with solvents; this includes the warming process and disposal techniques.
4. Once you have gently removed the enhancement, perform a mini manicure to condition and rehydrate the client’s nails and hands and advise them of the correct aftercare.
Love Katie B x

Read the latest issue


