How to create different nail shapes
By Katie Barnes | 06 June 2017 | Feature, Technique

Salon owner, educator, former Scratch columnist and award-winning nail stylist, Katie Barnes, reveals how to create different nail shapes depending on your client’s request
There are many different nail shapes that clients request and it is important to ensure that you are providing a structurally sound and durable enhancement with the correct form fit and apex for each shape.
The apex is the highest point and indicates the stress point, which is the weakest point of the nail. This must be in proportion to the length of the extension and is in different positions for different lengths and shapes and has been designed for the weakest point of that structure. Positioning the apex in the correct place helps to anchor the extension and give it flexibility. The longer the enhancement, the further back towards the cuticle the apex should be – but not too far back so it creates an unsightly hump that will create no strength. If your apex placement is too far forward, it will pull the free edge downward over the fingertip and create weakness.
Form positioning changes for different shapes to allow all enhancement side walls to come out straight from the natural nail side wall and be parallel to ensure a strong structure.
All nail shapes are developed from the basis of a square or almond shape or a hybrid of the both.
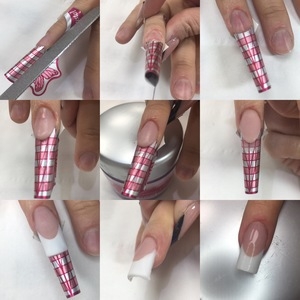
Square (Squoval, Marilyn)
A square enhancement should have perfectly straight side walls and the upper and lower side lines should be completely parallel with each other.
For a softer square enhancement, you can make a ‘squoval’ shape by holding your file at a 45 degree angle when filing the free edge.
Form fit
Side view: absolutely straight in line with the middle of the finger
Birds eye view: parallel from side walls with no tapering and open ended
Apex – centre of ‘extended’ nail bed area and comes straight out from the apex to free edge.
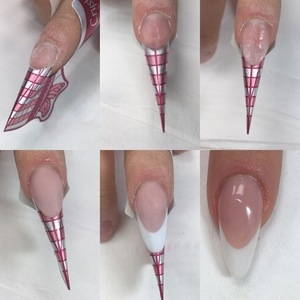
Almond (Rounded, Oval, Stiletto)
An almond shaped enhancement slims and lengths the finger when executed correctly and can be as pointed or rounded as desired. It should not hook down or look wide and bulky.
Form fit
Side view: slightly down (creating a straight line from the apex to the free edge)
Birdseye view: closed
Apex (Balance Point) – 1/3 nail bed then comes down at an angle to free edge.
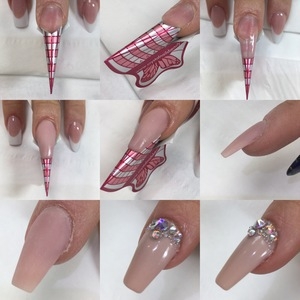
Tapered Square (Ballerina/Coffin)
Something to mention about this shape is that it is in fact a square enhancement that tapers in from the extension only. Don’t be tempted to file your side walls at an angle past the extension as this will create a weak supporting structure.
The shape looks like the end of a ballet shoe ‘on point’ and the coffin shape is often confused. If you think of what the actual shape of a coffin looks like, this is probably not what the tech or client wants to create.
Form fit
Side view: straight like a squared
Birds eye view: closed like an almond
Apex – 1/3 nail bed and straight from apex to free edge.
If your form fit and apex placement isn’t accurate, then you will find yourself over filing to try and compensate and potentially creating a weakness or having excess bulk of product which whilst also looking unsightly, puts pressure and stress on the enhancement making it more likely to break or damage the natural nail.
Each shape requires a different form fit and apex placement. If you maintain one shape and change to another other, the fit and apex will be in the incorrect place leading to a weak structure and unbalanced enhancement.
A nail technician’s aim is to create the most natural and sleek looking enhancements whilst creating the most structurally sound and long-lasting enhancements for our clients. Spending a little more time to practice and perfect your form fit and product placement will make all the difference.
Love Katie B xx

Read the latest issue


