How to fit nail forms like a boss
By Katie Barnes | 06 October 2021 | Expert Advice, Feature

Form fitting is one of the biggest nail tech troubles that causes concerns in the industry. There are so many different components and elements that all have to be correct for success when using nail forms. Perfecting your form fitting technique will mean the difference between a structurally strong nail and experiencing issues.
Choosing the right nail form
The first step to success with form fitting is choosing the right nail form to suit you and for the task at hand. When you are working with the wrong platform, then everything else is made difficult.
Customising your nail forms
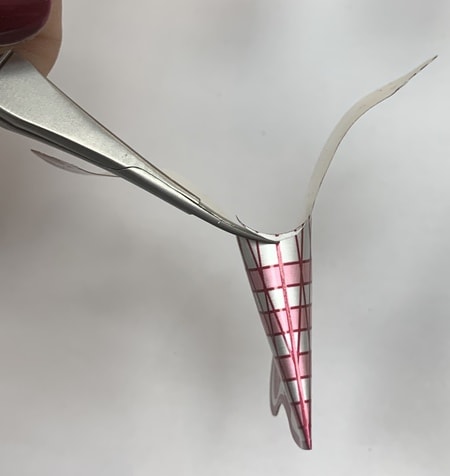
The second element is making sure that nail form fits seamlessly. A lot of techs have issues fitting forms properly because clients’ nail shapes and fingers are all so different, and the round shape of the form opening doesn’t always match up to the client’s nail. That’s why it’s often essential to adjust the nail forms according to clients’ natural nail shapes.
Sculpting nails is like architecture; if the foundation is incorrect, the structure will be compromised. If a form doesn’t fit perfectly, adjustments are required to get that perfect fit.

If your form is not straight and facing to one side, then the enhancement will follow this too. If your form is tilting down, then so will your enhancement, which will then grow out over 2-3 weeks and keep growing downwards, putting unnecessary strain on the natural nail. It is paramount to ensure that as well as the correct placement; the correct adjustments are also made.
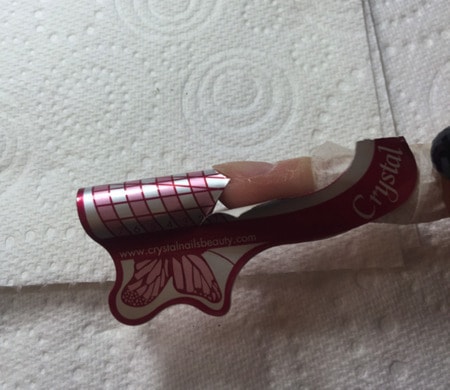
I cut the form where it meets the natural nail to ensure that it fits snuggly under the natural nail. It is common to need to adjust this for a perfect fit. If there is a gap between the natural nail and the form, then the product will leak under and create a ridge at the join. Not only will this give the client something to pick at, it will also create a weakness.

It is good practice to remove the length of the natural nail prior to applying you form. The reason for this is that if the natural nail does not grow flawlessly, then the length you leave will affect your form placement and you will not get a tight or perfect fit. If the natural nail tilts upwards like a ski-slope, then your form will do so, along with your nail enhancement. If you remove this natural free edge, then you can correct this and create a perfectly straight structure. I always make cuts in the form from the nail sidewall at 45-degree angle outwards. This allows a tighter pinch and preformed C-curve, with less need for pinching after application.
Different nail shapes require different kinds of form fitting. Form positioning and adjustments are important to ensure that you are creating the correct structure for your enhancement. The main shapes we come across for salon nails are almond and square.
Form positioning: ALMOND NAIL
Form position: Form should be slightly pointing down.
Apex (highest point): 1/3 of the nail extension.
Form positioning: SQUARE NAIL
Form position: absolutely straight, the wings parallel and 1/2mm apart.
Apex (highest point): centre of ‘extended’ nail bed area. If creating a long square nail, change the highest point to further up.
Form fitting

Hold a ruler or something perfectly straight along the centre of the finger. Although to the eye, this form may appear straight, it is tilting down slightly.
This would not be a correct placement for a square shape, as the enhancement would tilt down and therefore not be straight.
This form placement would be suitable for an almond shape as long as the end of the form was then closed.
Compare this photo to the one above and you can see the difference where this form placement is straight from the centre of the finger.

This is the correct fitting for a square shape.

Correct form placement with nail bed application and smile line filed.
‘Problem nails’
Nail Biters
Throw a nail biter into the equation and this can send a techs anxiety through the roof. Dealing with a nail biter can be one of the most difficult customers, but with a few simple steps or by following this tutorial you can master form fitting on a nail biter.
Extended Hyponychium Growth
When you come across a client who finds that forms feel very uncomfortable – with pinching at the smile line – they probably have extended hyponychium growth (where the skin protrudes the free edge). The solution is to create a proper fit and reduce the pressure by cutting in a deeper curved indentation at the contact point of the form.
How the nail form is placed and closed are both critical components for a successful end result.
Watch my form fitting and tailoring procedures from start to finish here.
Bringing all these elements together will help you achieve success and gain confidence with your form fitting. Although it can seem fiddly, it is important to spend a little extra time on these steps because if your forms are fitted perfectly, you will have the perfect foundation to build on and the following steps of application will flow more easily.
Love Katie B x

Read the latest issue


