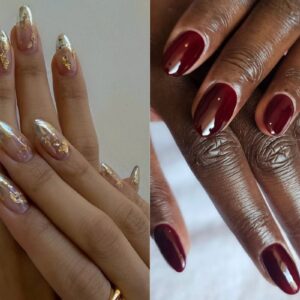
How to create an ombré nail style
By Katie Barnes | 07 September 2021 | Expert Advice, Feature
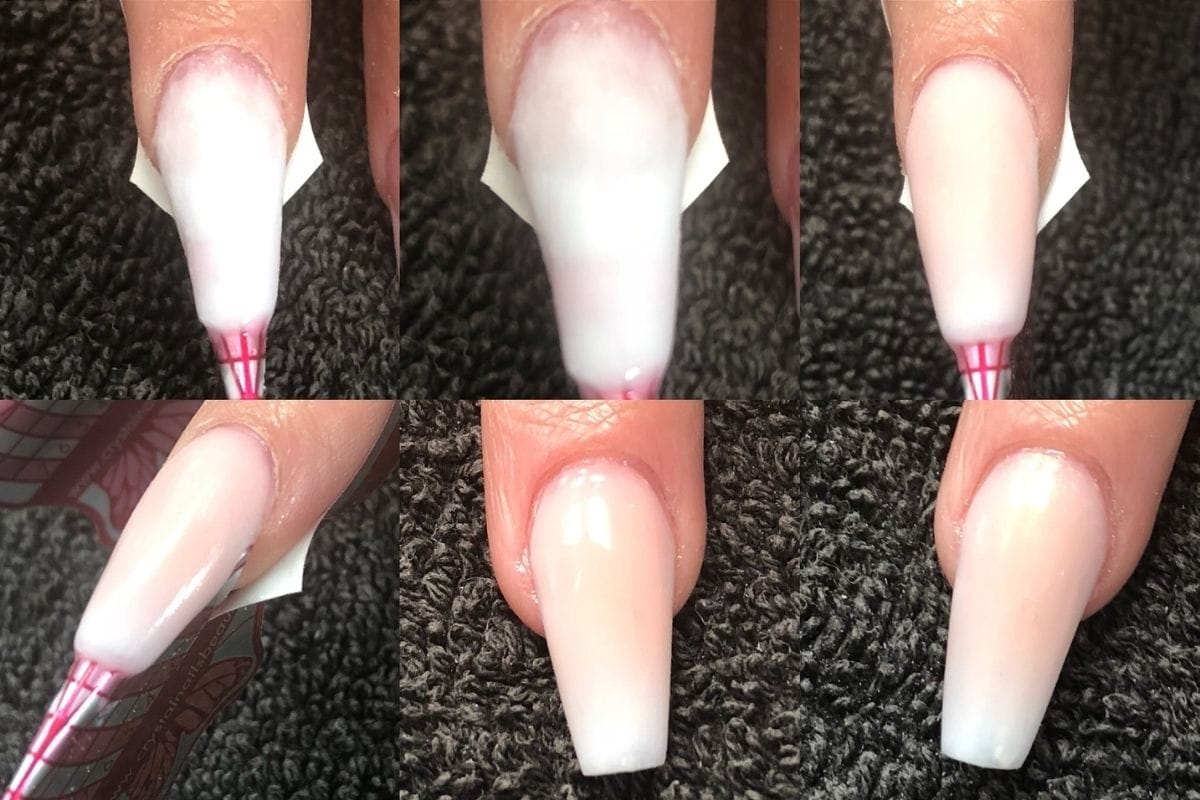
The ombré look is a popular nail style choice, particularly when created using with pink and white shades to replace a traditional French finish. Perfecting it can be a bit challenging however, especially when you’re under the watchful eyes of your clients and time restraints of the appointment.
There are hundreds of different ways to achieve the perfectly blended ombré and each tech will hone their own. Rather than share them all, I am going to share some tips and my preferred techniques to help you learn how to create ombré nails your clients will love.
What is an ombré?
Ombré means ‘shaded’ in French. It is the blending of one colour hue to another, usually moving tints and shades from light to dark.
What medium should be used?
This comes down to preference and the look required. The possibilities are endless including gel polish, liquid & powder, acrygel, hard gel, nail polish and pigments. The range of tools which you can use varies from ombré sponges, ombré brushes, make-up sponges, jelly stampers and brushes. Play around with difference mediums and tools to find the perfect one to suit you.
The ombré sponge technique
This technique works with gel paints, soft gels and gel polish but due to the high pigment content and thicker viscosity, my preferred medium is gel paint. When working with gel polishes with this technique, due to the thinner viscosity more layers are required for full coverage. This technique creates great success when used with pink & whites, colours and darker shades such as red and black.
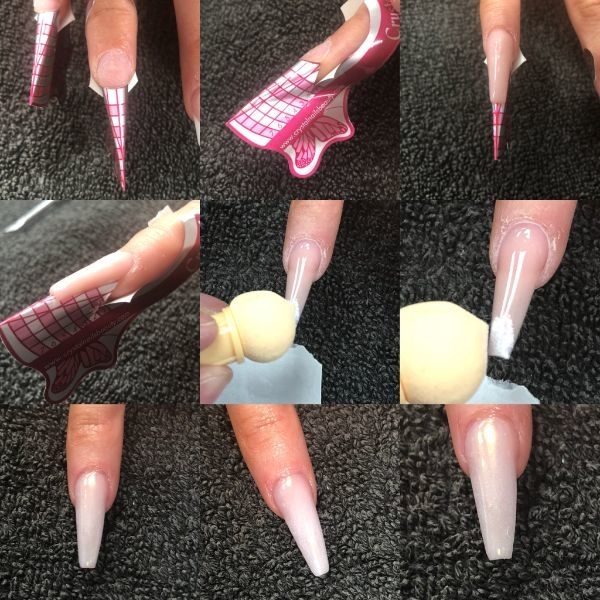
Steps 1 & 2: Fit form as usual
Step 3 & 4: Create the enhancement using a cover pink shade or use a cover pink shade on the natural nail.
Step 5: Use an ombré sponge head (I find this more effective when removed from the handle and just the head used). Before using, use a lint free roller to remove any fluff from the sponge head. Pick up some gel paint, dab the excess off and place the sponge on the free edge.
Step 6: Starting at the free edge, dab from side to side and downwards towards the cuticle zone. Finish about ¾ of the way up the nail. As you work downwards, the pigment will become more sheer, leaving you with a perfect blend. Repeat these steps until the desired coverage and blend is achieved. When using gel paint, I find this only takes 2-3 layers. It is important to make sure each layer is fully cured in-between applications.
Step 7: Apply chrome pigment if desired.
Note: You can keep the sponges and reuse by keeping in a container where no light can get in, otherwise the colour will cure.
The L&P ombré
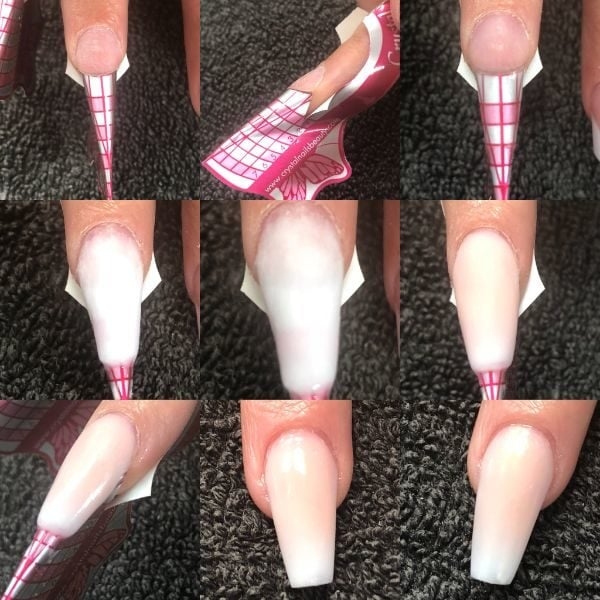
Step 1: Fit form as usual.
Step 2: Ensure the form is tailored perfectly. If the form fit isn’t spot on, then the product on top will not be even and seamless. This will cause issues with the blend.
Step 3: Apply a super thin layer of clear acrylic if desired.
Step 4: Apply a white bead to the free edge and feather down. Cover around ¾ of the nail. Ensure this layer is kept thin to prevent filing through the pink and getting an uneven blend. As you can see the photo is almost sheer.
Step 5: Apply cover pink bead at the cuticle zone and blend over the rest of the nail.
Step 6: Refine to shape. If you experience filing through your blend, the lower layers were too thick or uneven.
Step 7: Apply top coat as usual.
Coloured ombrés
Colour choice, for example, can make or break an ombré look, so when selecting colours, pick shades that are similar in tone and brightness. Select colours that complement each other, like green and blue or pink and orange, as you’ll have an easier time blending these combinations. Once you have mastered the blend, you can experiment with colours such as black and white and black and red!
To perfect a colour blend, you can select a brush and feathering technique, sponge or even use white gel polish and coloured pigments. My favoured technique is the ombré sponge as demonstrated for the pink and white ombre. Sara from Glamourphile offers an alternative method which is effective and simple to nail your coloured ombré designs.
Play around with different mediums and techniques to find the one that works for you.
Love Katie B x

Read the latest issue


