
How to choose the right brush for your L&P nail needs
By Katie Barnes | 29 May 2018 | Expert Advice, Feature, Technique
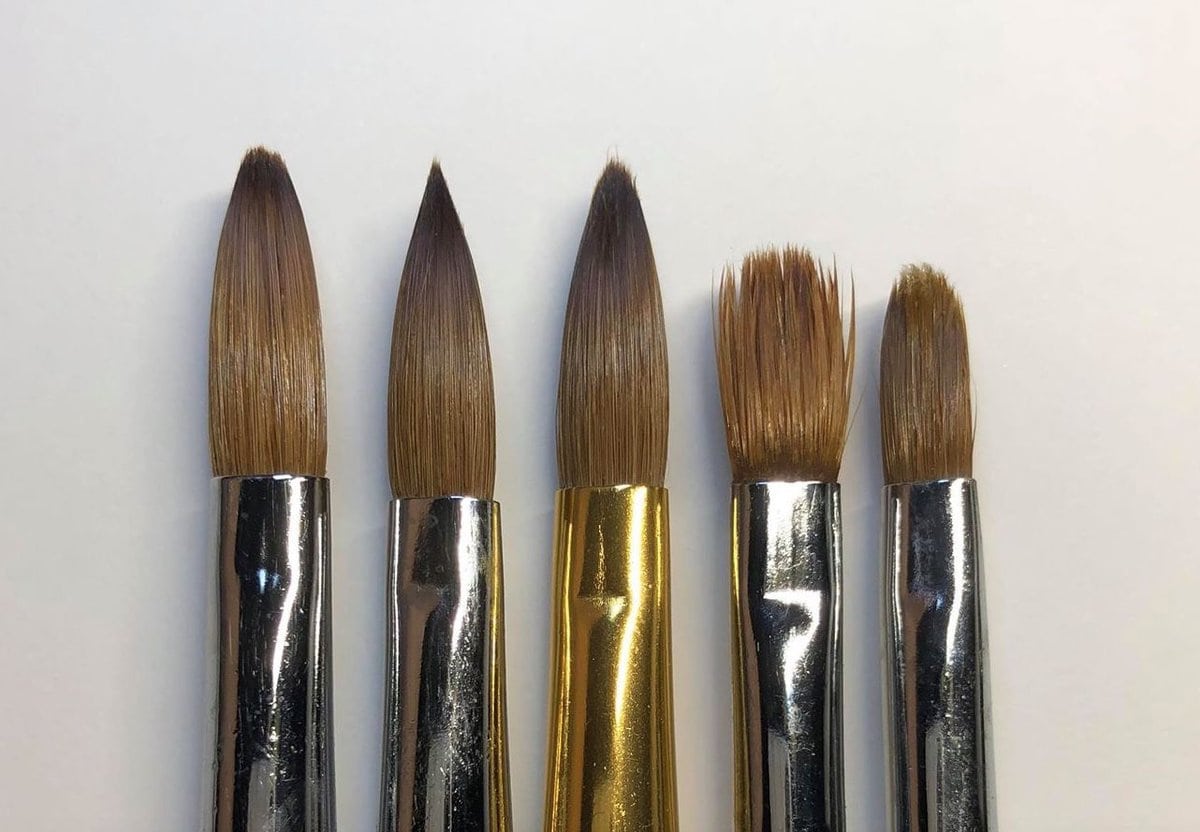
Educator and award-winning nail technician, Katie Barnes, offers advice on choosing the right brush for L&P acrylic needs…
 Alongside your technical skills, your brush is an important element for achieving good results with L&P. Sometimes, the only way to tell the quality of a brush is in its performance and this can often be a trial and error process.
It is important not to choose a brush that is excessively large as this will become overloaded with monomer and will be almost impossible to avoid skin contact and therefore potential allergies and skin irritations. With a brush this size, the bead pick up will be too large and beads too wet. As well as the above concerns, this could also cause service break down such as lifting and incorrectly cured product, again leading to potential allergies and skin irritations.
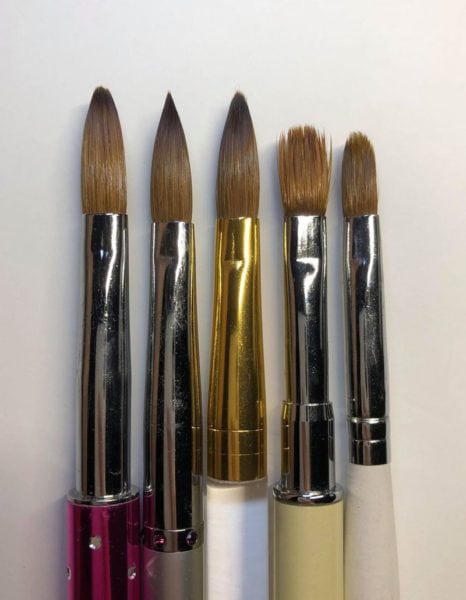 At the same time, you don’t want a brush that is too small. You won’t be able to pick up a good size bead and it is likely to be too flimsy. When choosing your acrylic brush, the firmness of the brush is one of the most important elements to consider, not just the size. Take into account that sizing can vary from brand to brand, one company’s size 6 may be more like another company’s size 10 (see image – these are all size 6 from different companies).
Large brushes can also be very flimsy, so don’t assume they will be firm too. A firm brush is paramount to allow you to pat and press the product, so the brush controls the product, not the other way around and you are able to mould the product. If the brush is too flimsy, you will typically work too wet as it will work more like a paint brush. As well as the product just sticking to itself and your brush, your mix ratio will be incorrect, again, causing the problems above.
Don’t automatically be drawn to price or have magpie eyes and think a blingy handle means quality. If you want a pretty handle, why not jazz it up yourself with your artistic skill with some painting or 3D work? It will be a guaranteed talking point and walking advertisement with your clients and may even encourage them to add additional nail art services. Don’t be tricked into purchasing expensive brushes that are endorsed by celebrities and social media techs selling ‘speed application’. This kind of application is often responsible for monomer being flooded over the skin and will not give you correct product control and ratio. With correct product control, you will use less product, which will save money and will require less filing which again, saves time and therefore money. Remember – you control the product, it doesn’t control you. You shouldn’t be needing to chase it around and if you are, it is too wet.
Acrylic sticks to acrylic, so if you work too wet, it is likely that your brush will have acrylic residue remaining in it. When you use this for your next set, you will just keep getting the same problem. When wiping your brush, you must gently roll it into a point, never wipe side to side or back to front. This will make the bristles splay out and damage them. This point is paramount for a perfect cuticle and neat sidewall application.
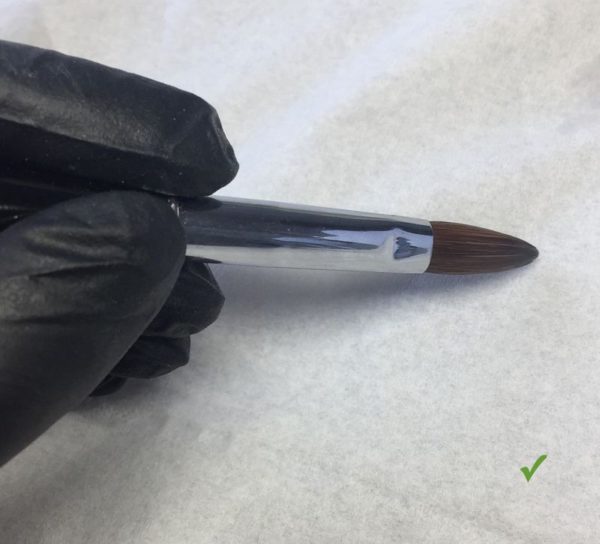
How to correctly clean a brush
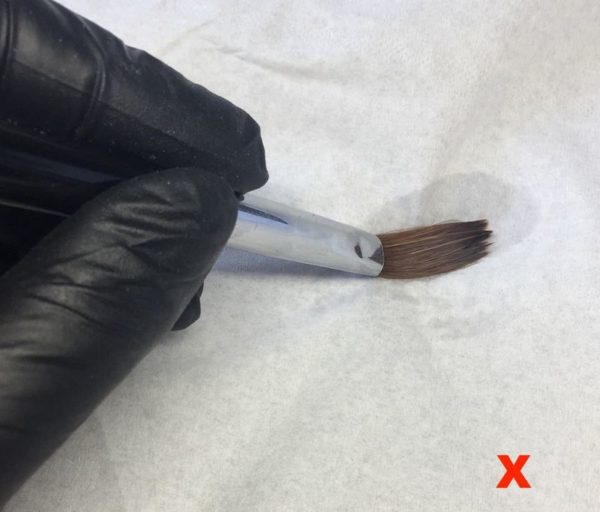
Incorrect cleaning of a brush
If your brush is too large or flat and squared at the tip, you also won’t be able to carry out this application neatly and safely.
It is important to use a soft tissue. Kitchen roll is too rough and will shorten the life of your brush. Couch roll will suffice, but is extremely thin and very absorbent, leading to large amounts of monomer on this.
It is important to constantly replace this as you work.
Some of my favourite brushes are the simplest ones, with plain wooden handles.
Even though recommendations are invaluable, it is important to find the perfect brushes to suit you.
Love Katie B xx
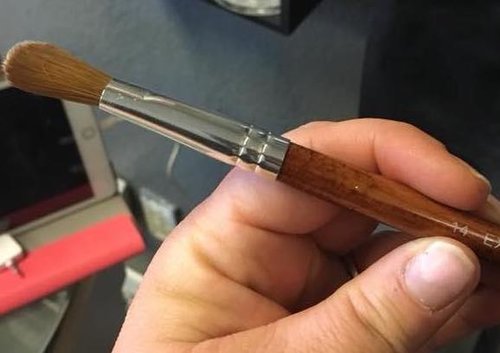
If you look at the size of the brush compared to the thumb, it gives you a proportion to how large the brush is. The brush is too large to work safely and neatly with, especially with the flat square tip without skin contact. The tip should be kept in a point with the above tips.
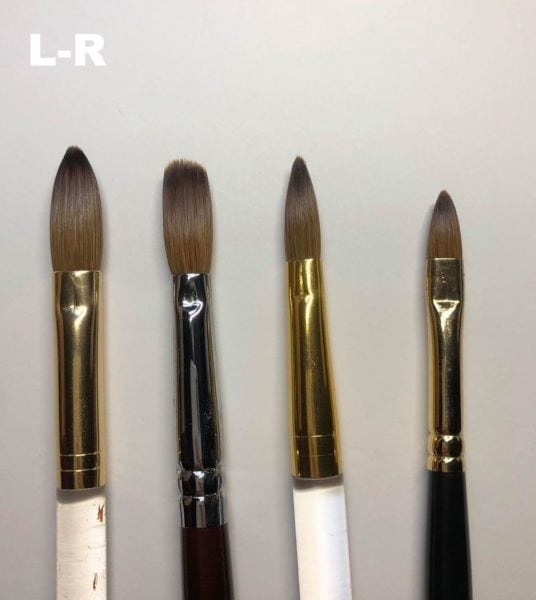
L-R: large brush with a pointed tip and large belly, that is firm for good product control. Flat brush that doesn’t allow neat and safe cuticle work and is likely to cause skin contact. A smaller version of the first brush but is flimsier giving less product control. 3D brush with a flat belly and pointed tip for neat and precise application.
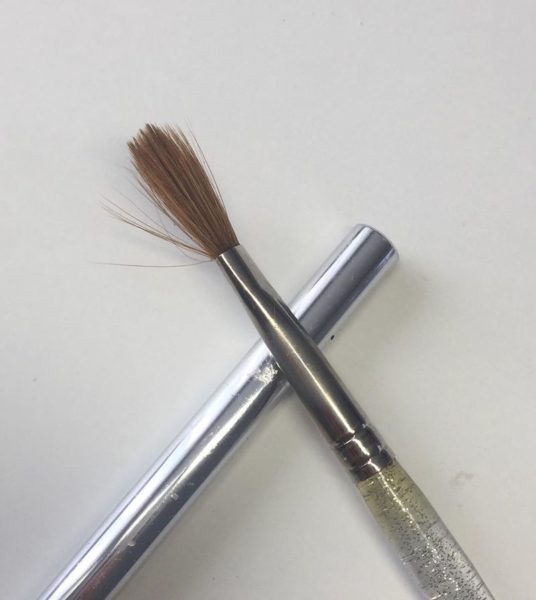
Acrylic has stuck into this brush, so the product application was likely to be too wet. You cannot work with this brush.

Read the latest issue


